I was recently searching for a simple and straightforward solution to try out Nextcloud, an open source file-sharing platform that can be selfhosted. Interestingly, I observed that TrueNAS has an “Apps” section that allows you to install a variety of apps in your TrueNAS instance.

Apparently there are 107 apps that can be installed!

Searching for “nextcloud” brings up the app in the search results.

After clicking on the icon, all I had to do was click the “Install” button.

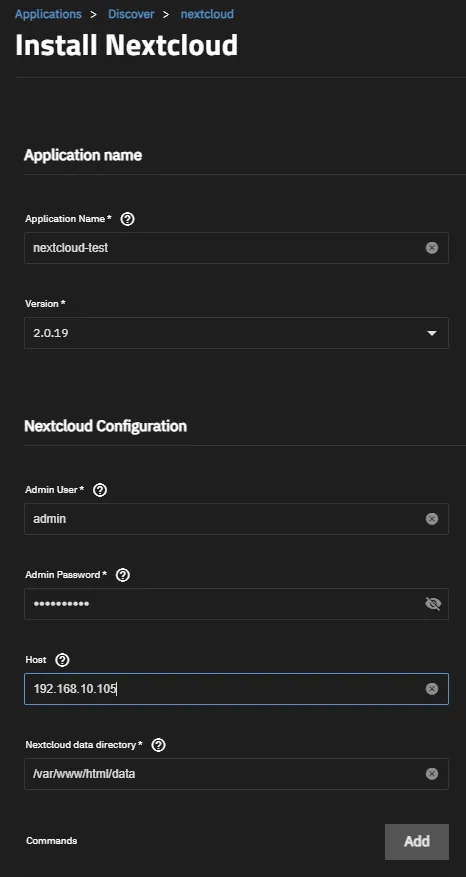
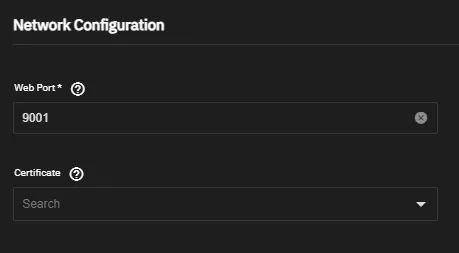
During the install process, there are a variety of fields to look through. I kept everything default, including the port at 9001.


Once this was completed, I clicked the “Install” button at the bottom of the screen. This began a quick installation and deployment process.

After the deployment finished, I was able to open a new browser tab and type in the IP address followed by the port. It appears that it is also possible to click the “Web Portal” button on the page.

I was then greeted by the Nextcloud login screen and was able to log in with the credentials I configured during the install!


Something to note is that the default files are stored in the following path:
/mnt/Homer/ix-applications/releases/nextcloud/volumes/ix_volumes/html/core/skeletonFrom there, the default files and folders can be changed or removed so they are not generated when creating new users.

And that’s it! If you need any details about the newly installed app, you can see them from the installed applications tab. If you have any questions, please drop a comment below!
